Combining a sauna with your shower creates an incredibly efficient use of bathroom space while delivering a complete spa experience. I've helped numerous homeowners design these hybrid spaces, and when done correctly, they offer the best of both worlds—a relaxing sauna and convenient shower in one integrated area.
Let's explore how to plan, design, and execute a successful bathroom sauna-shower combination that maximizes your space and enhances your daily wellness routine.
Why Combine Sauna and Shower?
The concept makes perfect sense when you think about it. After a sauna session, you want to shower anyway. Why not integrate these functions? Bathroom locations provide existing plumbing, electrical access, ventilation infrastructure, and proper flooring—all essentials for sauna installation.
Key Benefits
- Space efficiency: One footprint serves dual purposes
- Convenience: Seamless transition from sauna to shower
- Cost savings: Shared plumbing and ventilation reduce installation costs
- Existing infrastructure: Leverage bathroom utilities already in place
- Increased home value: Unique feature that appeals to buyers
Design Approaches for Sauna-Shower Combinations
There are three main approaches to combining saunas with showers, each with distinct advantages:
1. Separate But Adjacent
This approach creates a sauna adjacent to your shower with a shared wall or doorway. The sauna remains a traditional dry environment while the shower handles all wet functions. This is the most common approach and easiest to implement.
Pros: Clear separation of functions, traditional sauna experience, simpler construction, easier maintenance
Cons: Requires more total space than fully integrated designs
2. Shower-in-Sauna
Install a shower inside your sauna space, typically as a handheld sprayer or simple showerhead. The entire space is waterproofed to handle shower use, then functions as a sauna when desired.
Pros: Extremely space-efficient, natural progression from sauna to cooling shower, interesting aesthetic
Cons: Requires excellent waterproofing, more complex construction, potential for moisture issues if done incorrectly
3. Convertible Space
Design a space that can function as either sauna or shower depending on your needs. This typically involves a tile-lined room with both sauna heater and shower fixtures, along with proper ventilation and drainage.
Pros: Ultimate space efficiency, flexibility in use, modern aesthetic
Cons: Most complex to design and build, requires careful material selection, demands excellent waterproofing and drainage

Space Requirements and Layout Planning
Most bathroom sauna combinations require at least 40-60 square feet total, depending on your approach. For separate but adjacent designs, you need space for both a compact sauna (minimum 4x4 feet) and shower area (minimum 3x3 feet).
Minimum Dimensions
| Design Type | Minimum Space | Comfortable Size |
|---|---|---|
| Separate Adjacent | 50 sq ft | 70-80 sq ft |
| Shower-in-Sauna | 25 sq ft | 35-40 sq ft |
| Convertible | 30 sq ft | 40-50 sq ft |
Layout Considerations
Position your sauna where it has access to plumbing (for shower function) and electrical (for heater). Corner installations work beautifully, leveraging existing walls. Ensure the door opens into the bathroom proper, not into your shower spray area.
Plan for bench placement that doesn't interfere with shower use. In shower-in-sauna designs, position the showerhead away from direct contact with sauna heater and benches to prevent accidental activation.
Waterproofing: The Critical Factor
This is where bathroom sauna combinations get serious. Proper waterproofing protects your investment and prevents costly moisture damage.
Material Selection for Wet Areas
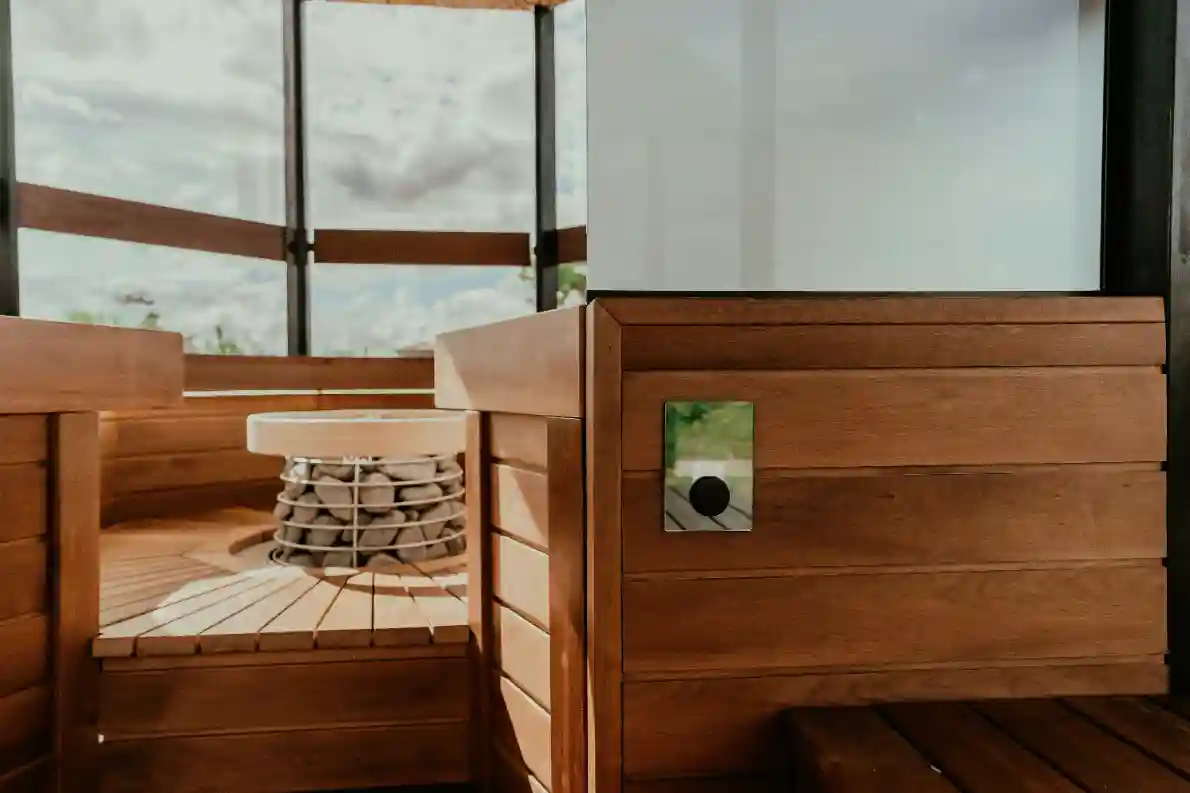
Use tile or stone for all surfaces that will contact water directly. While cedar is traditional for saunas, it doesn't handle constant water exposure well. Reserve wood for bench tops and upper walls above the splash zone.
For shower-in-sauna designs, use tile on floors and lower walls (at least 6 feet up). Install cedar or other sauna wood above tile areas. Create a clear transition between wet and dry zones.
Drainage Requirements
Any space that combines shower function absolutely requires proper drainage. Install a quality shower pan with appropriate slope (at least 1/4 inch per foot toward drain). Ensure your drain can handle sauna heat—standard ABS or PVC drains work fine.
Consider a linear drain along one wall rather than center floor drain. This allows better floor slope and easier bench installation.
Vapor Barrier Strategy
Use waterproof membrane systems like Schluter or similar products for shower areas. These create continuous waterproofing from floor through walls. In transition areas between wet and dry zones, carefully detail the connection between waterproof membrane and traditional sauna vapor barrier.
Ventilation Design
Bathroom sauna combinations need robust ventilation to handle both shower moisture and sauna operation.
Dual-Purpose Ventilation
Install a bathroom fan rated for the combined space (typically 80-120 CFM for most installations) that can run during shower use. This is separate from your sauna ventilation vents, which operate during sauna sessions.
Position bathroom fan away from sauna heater to prevent pulling excessive heat during sauna operation. Run it after showers to remove moisture quickly.
Sauna Ventilation in Bathroom Environment
Use standard sauna ventilation principles: intake near heater, exhaust on opposite wall. In bathroom settings, you can sometimes leverage existing bathroom ventilation as supplemental exhaust, though dedicated sauna vents still work better.
Electrical and Heating
Bathrooms already have electrical service, but saunas require dedicated circuits. Work with your electrician to assess panel capacity and plan appropriate circuits.
Heater Placement in Combo Spaces
Position heaters away from shower spray. In shower-in-sauna designs, install the heater high on a wall opposite the showerhead, with proper splash protection. Ensure electrical components meet bathroom electrical code requirements (proper GFCI protection, appropriate zones).
For detailed electrical planning, review our comprehensive guide on sauna electrical requirements.
Material Choices for Longevity
Select materials that can handle both wet and dry heat conditions:
Flooring
Porcelain or ceramic tile is ideal. Choose textured or non-slip finishes for safety. Natural stone works but requires sealing. Avoid wood flooring in wet areas—even in sauna-only zones, occasional splashing happens.
Wall Materials
Combine tile (wet zones) with cedar or hemlock (dry zones). Create attractive transitions between materials. Use stainless steel or plastic trim pieces at boundaries to protect edges and provide finished appearance.
Bench Construction
Build benches from cedar or aspen that can handle occasional moisture exposure. Design them to allow water drainage—don't create ledges or pockets where water can pool. Removable bench tops facilitate cleaning underneath.

Cost Analysis
Bathroom sauna combinations typically cost more than standalone saunas due to waterproofing requirements, but less than building sauna and shower separately.
Budget Estimates
- Separate Adjacent (DIY): $5,000-8,000
- Shower-in-Sauna (DIY): $4,000-7,000
- Convertible (DIY): $6,000-10,000
- Professional Installation: Add $3,000-8,000 for labor
Major cost factors include waterproofing materials, tile work, custom shower pan if needed, and electrical upgrades. Bathroom locations save money on running utilities compared to distant locations but may require more permits and inspections.
Building Code Considerations
Bathroom renovations often trigger multiple permit requirements:
- Electrical permits for new circuits
- Plumbing permits for shower installation/modification
- General building permits for structural changes
- Verification of adequate ventilation
- GFCI protection in required areas
Check requirements early. Some jurisdictions have specific codes about sauna installations in bathrooms, particularly regarding ventilation and moisture management.
Maintenance and Care
Bathroom sauna combinations require diligent maintenance to prevent moisture issues:
Daily Care
- Wipe down benches after sauna use
- Squeegee tile walls after showering
- Run ventilation fan for 20-30 minutes after either use
- Leave sauna door open between uses for drying
Weekly Tasks
- Clean tile surfaces with appropriate cleaners
- Vacuum floor thoroughly
- Check for any standing water or drainage issues
- Inspect seals and transitions between materials
Monthly Inspection
- Deep clean all surfaces
- Check caulking and grout for wear
- Verify proper drainage and ventilation function
- Inspect wood surfaces for any moisture damage
Common Mistakes to Avoid
- Inadequate waterproofing: This will bite you. Don't cut corners on moisture barriers and waterproof membranes.
- Poor drainage: Even "mostly dry" saunas in bathrooms need proper drainage for cleaning and occasional splashing.
- Wrong heater location: Keep heaters completely out of water spray zones with appropriate barriers.
- Insufficient ventilation: Bathroom humidity plus sauna heat requires robust ventilation systems.
- Material selection errors: Using bathroom-only materials in sauna zones or sauna-only materials in wet zones.
Real Example: A Successful Transformation
A recent project involved converting a 5x8 foot bathroom into a combined space with a 4x5 compact sauna and 3x4 shower area. We used a separate-but-adjacent approach with a shared wall and doorway between zones. The sauna had traditional cedar construction with proper insulation and vapor barrier. The shower area used porcelain tile throughout with a curbless entry for modern aesthetics.
Total cost was approximately $6,800 DIY (including professional electrical work). The homeowner reports using it 4-5 times weekly and loves the convenience of the integrated design. Key success factors included meticulous waterproofing, excellent ventilation (both dedicated sauna vents and a powerful bathroom fan), and not rushing the construction process.
Design Inspiration and Final Thoughts
Bathroom sauna combinations represent creative problem-solving at its best. They prove you don't need a massive home or unlimited budget to enjoy sauna benefits. With careful planning, proper waterproofing, and attention to ventilation, these dual-purpose spaces deliver exceptional value.
Start by honestly assessing your space and skills. Choose an approach that matches both. Don't attempt a complex convertible design if you're tackling your first DIY sauna—opt for the simpler separate-adjacent approach instead.
For more ideas on maximizing small spaces or general design principles, explore our other guides.
The result of thoughtful planning and careful execution? A spa-quality experience every single day, right in your own bathroom. That's worth the investment.